Here is yet another DIY Striped Curtain post. I basically followed the tutorial from this site with a only a few modifications.
Here are the supplies:
1 biodegradable drop cloth
1 pint of Valspar flat enamel paint in Paddle
2 x 6 oz bottles of Martha Stewart Fabric Medium
Lots of Blue painters tape
Roller Brush and Paint Tray
Pencil
Long edge for drawing on the lines
1 2-pack bleached Merete curtains from Ikea
I learned the hard way but you should at least run the curtains through the dryer with some wrinkle release if not wash and dry them completely before starting this project. If the curtains are as flat as possible it will help to keep the lines even while painting.
Steps:
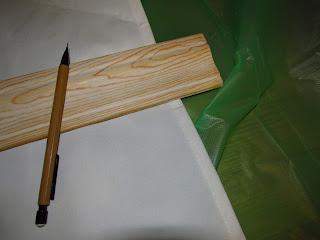
1. I basically used the cardboard insert that came in the curtain packaging to mark off my line breaks for the stripes. So my stripes are much wider than the one in the tutorial referenced above. I marked off the side hems and used the straight edge (a piece of extra moulding) to make a nice even line width-wise across the curtain.
2. Use painters tape to section off the areas to be painted. Remember to tape off on the inside of the non-painted areas to create nice even stripes. Run over the tape to make sure it securely sealed to minimize the paint seeping through.
3. Mix up the paint and fabric medium in a 2:1 ratio. I mixed one 6 oz tube of medium at a time with 12 oz of paint, just so I didn't end up with a lot of extra paint.
4. Use roller brush to apply paint evenly. Don't press down to hard witht he roller around the tape, even if you have pressed the tape down and sealed it well, this could lead to a bit of the paint bleeding through. Wait for the first coat to dry completely before applying the second.
5. Once the paint has dried for 12-24 hours, they are ready to hang. You make notice some spots where the paint needs some touching up, but it is very easy to fill it in and easier to see these spots while it's up on the curtain rod.
6. You're done! Sit back and admire your handiwork!
Here are the pictures of the curtains closed and open below. I am really glad I tried this project and I hope you will be too!


No comments:
Post a Comment