Saturday, January 4, 2014

New Products To Try: Nuance by Salma Hayek

I decided to post an update about some products that are animal testing free and give you my first impressions of these products.  I found these in the drugstore and because I was not keen to try any new Burt's Bees products, I was perusing the aisle and found these:
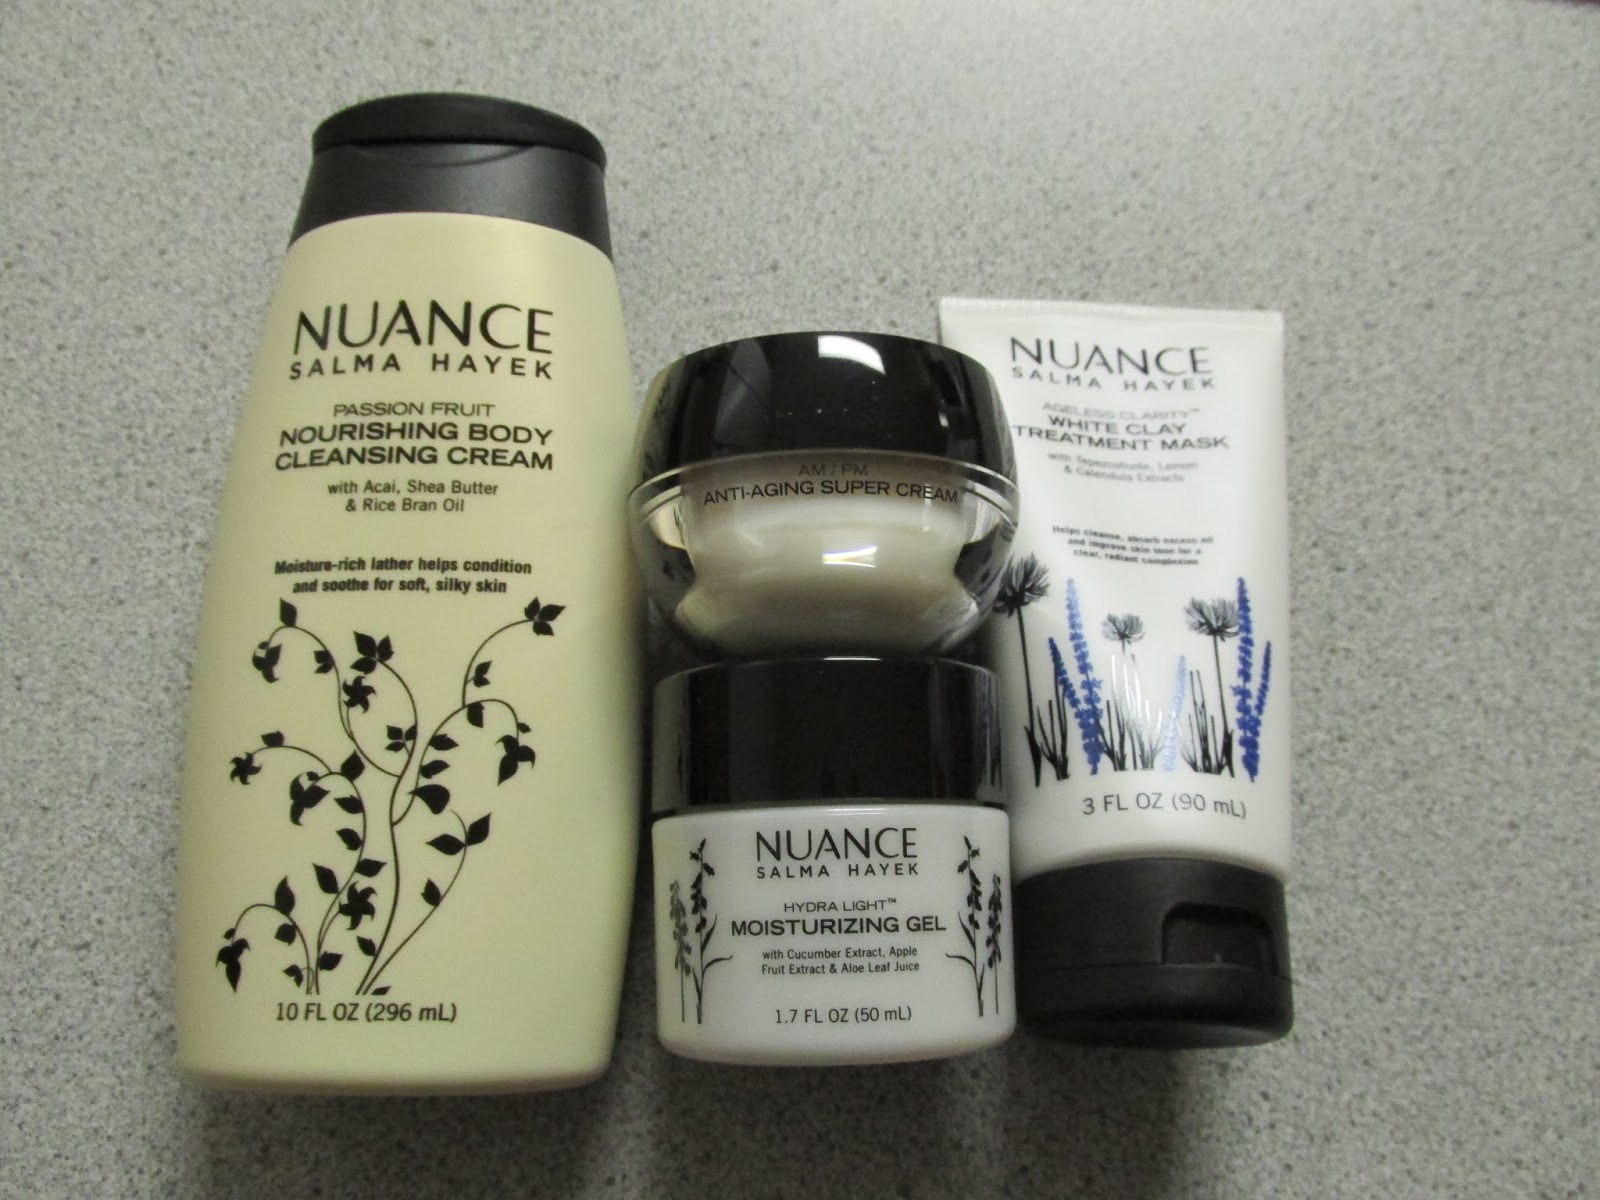


These products claim no animal testing and have the all important bunny symbol on them.


What I liked about them immediately is that the ingredients were free of sunflower seed oil.  I am allergic to sunflower seeds and I noticed that skincare products I had previously tried that had the oil were leaving my skin splotchy and irritated, so I was keen to find some products that don't contain it even though I have no trouble eating foods cooked with the oil.  Regardless, I figured these were worth a try.  If you live in a cold place in the south like we do, one cream may not be enough unless you want to splurge but mostly on small quantities (see my post about Avene Rich Compensating Cream here). 

Here is what I like about each of these products right off the bat:


Hydrating Gel:  nice clean, mild scent of cucumbers;  good texture, absorbs well; this is meant as an additional day cream during the cold weather here
Anti-Aging Super Cream:  again: clean and mild scent, nice texture, absorbs well; I'll post an update if the results are comparable to Roc and Clinique after I've used it more


White Clay Treatment Mask: this is meant to replaced the Proactiv spot treatment and it smells way nicer than the other sulfur based masks, definitely worth a try based on that; again I'll post an update about it's efficacy after several weeks of use


Nourishing Body Cleansing Cream : delightful smell, comparable to Aveeno Cream Wash for sensitive skin; definitely avoid soap based bath cleansers if you have sensitive skin and are enduring cold weather!

Hope this posts gives you some ideas and I'll post the updates when I'm confident I have given them a good run!

Friday, January 3, 2014

DIY Monogram Stationery

Here is a super easy post about monogram stationery.


All you need is a set of stencils of your choice (I chose some from Martha Stewart, which I got at Michaels), some blank cards + envelopes, and a metallic pen or marker.


The stencils I had nicely lined up with the edges of cards and envelopes.  Just outline the inside of the stencil with a mechanical pencil and fill in with the metallic pen.  


Be careful with metallic markers as the ink can either get stuck or spill out of the nib.


I put some together in groups of tens and put them in a nice decorative box for some DIY gifting this Christmas!  


These would make great gifts for a new bride (you can always use new stationary when you change your last name), a birthday, or just for yourself to have a supply of one of a kind notes to send out to people!


Thursday, January 2, 2014

Cleaning Out the Coffee Grinder!

So we have had this coffee grinder for several years and we try to keep up with cleaning it out regularly.  One tip that I had read about and often used is to clean out the grinder with rice.  This way you don't have to try to pry your fingers under the blades to clear out any grounds stuck there.

Here is the picture before I cleaned it out.  Clearly it was in desperate need of a cleaning.


Add about 1/4 cup to 1/3 cup of rice.  I don't think it matters what kind as long as it's medium to long grain.


Run the grinder for about a minute.  I repeated the step with the rice twice just to be sure I got most of the grounds worked out.


Last thing I did was wipe the whole thing down with a bar towel dampened with hot water.  It was much easier to clear around the blades and now after just a few minutes we have a much cleaner coffee grinder.


Hope this trick is useful!


Wednesday, January 1, 2014

Happy New Year!

Happy New Year Everyone!

Thanks for helping the blog get off the ground this year!  I hope you, your family, and friends have a wonderful 2014!

~xo~

Tuesday, December 31, 2013

Review: Alba Botanica CC Cream

I was browsing the overwhelming aisles at Target before a recent vacation and found this little gem tucked away near some of the other natural products!  Alba Botanica CC Cream!


Generally, I prefer not to buy items like concealer or foundation at the big box stores but this one I had to try.  Not only does it have some sunscreen in it, but it's on Peta's Beauty Without Bunnies list, and the kicker: it was only $12!    This is not a full coverage foundation and I actually blend it with some of my moisturizer before applying with a makeup sponge.   I found that with the dry winter weather, if you put it on straight out of the tube - using your fingers to blend - it will cake a bit, the mixing with some cream or face lotion is a must.   If you need some coverage, use a concealer as well so just keep that in mind.  But I have to say, for the price, the quality was surprisingly good.  I have used it for the past few weeks and I think I'm sold.  It doesn't budge even after I apply blush or some powder.  I even put a little under my eyes and magically (though it didn't cover the past few weeks of rushing around and getting no sleep) I did not have an allergic reaction to it.  Unfortunately, I only saw it in two colors: fair/light and medium .  Regardless, I think this is definitely worth a try. 

Please note, this is not a sponsored post.  I'm just sharing some hopefully helpful info, from one picky type A beauty product user to another!

Monday, December 30, 2013

Tofu Breakfast Scramble

Here is an easy vegan breakfast dish for you!

Ingredients:
1 package extra firm tofu, drained
1 tsp each of garlic powder, turmeric, red pepper powder
Salt and pepper to taste
1 cup frozen chopped onions
1 cup frozen chopped green peppers
1/3 package of vegan bacon, chopped.

Step 1:  Preheat oven to 375*F.  Drain the tofu, I usually press carefully between two dinner plates to remove the excess water.  Place in a medium mixing bowl and then with a fork, lightly use the fork to scrape the block of tofu until it is the consistently of scrambled eggs.


Step 2: Mix in all the dry spices into the tofu.


Step 3:  In a medium cooking pot, cook down frozen onions and peppers, don't use oil, just cook them down.  Drain off excess water and mix in with tofu and spices.

Step 4:  Cut up vegan bacon into small squares and saute in a small bit of oil for a few minutes until crispy.  Drain off excess oil and mix into tofu/vegetable mixture. 


Step 5:  Transfer the mixture to a glass baking pan.  Bake for 1 hour, stirring half way through to make sure the moisture gets cooked out.


Step 6:   Ready to go - great pairing with a side of southern style hash browns!  This can make about 2-3 servings if dishes out on plates.  Can make 4-6 breakfast burritos depending on the size of the tortillas.


Enjoy!

Sunday, December 29, 2013

Bottle Brush Trees

Who says that everything at Christmas has to be red and green?  I personally like a color scheme that's a bit more neutral (think cream, greys, beige, silver, and pale blues).

Every year I find myself swooning over colored bottle brush trees on Etsy and every year I have to list the reason why I should not buy them, but should try to bleach and color some of my own.  This year I finally did it!

I got a set of assorted bottle brush trees from Michaels during one of their pre-Christmas sales.  I hauled out an old plastic container I no longer needed and schlepped out the bleach.  I used a 20qt container with a 1/4 cup of bleach and filled it half way with searing hot water.    Just drop the trees in, put the container is a safe, place (where dogs and kids can't get to them) and walk away for a few hours!

Below are the pictures and how long they were in before I got to the finished product.

Time Zero:

Two Minutes In:

Ten Minutes In:

Thirty Minutes In:

                                                                      One Hour In:
 

All Done:

Warning: Some of the flocking came off during the bleaching process, but if this doesn't bother you, then no need to worry!

I was going to pick out the ones that didn't get bleached quite as well and dye them a light blue and light grey with some Rit but I think I might just leave them these natural colors for the time being.  I'll be sure to post an update if they've been dyed or if I decide to jazz 'em up with some glitter or other embellishments.  This was ridiculously simple, so if you are a fan of colored bottle brush trees, I highly suggest trying this one!